Scripted REST APIs provide a way to create customized RESTful endpoints using JavaScript, enabling controlled access to the data in your ServiceNow system. When faced with a requirement to expose specific data in a particular way, scripted REST APIs offer a flexible solution. With these APIs, you have control over the inputs, how the data is retrieved and processed, and the format in which it’s delivered to users.
If the raw data from your system needs to be manipulated, transformed, or formatted before being sent to the user, scripted REST APIs allow you to handle that logic directly. As I’ll demonstrate in the examples below, scripting within these APIs provides the flexibility to meet complex requirements.
In this article, we’ll build a scripted REST API in a PDI for the incident table, enabling users to create and read incidents through API calls.
How to setup a new Scripted REST API
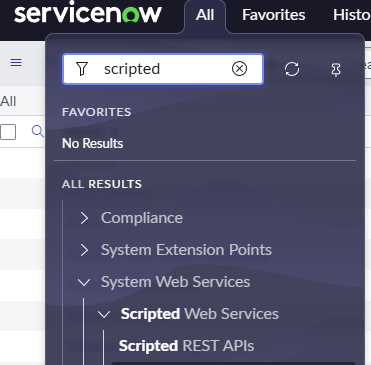
To create a new scripted REST API in ServiceNow, start by navigating to the Scripted REST APIs module. Use the Filter Navigator (located on the top-left side of the ServiceNow interface) and type "Scripted" Select the Scripted REST APIs module from the results:
Here, you will see a list of all the existing scripted REST APIs in the system. To create a new API, click the New button located at the top-right corner of the page:

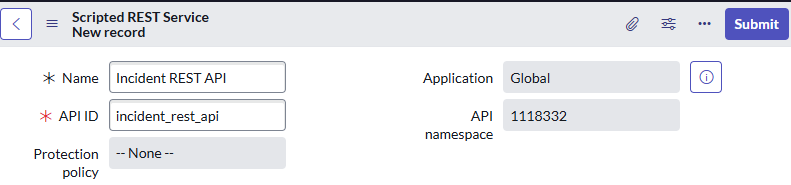
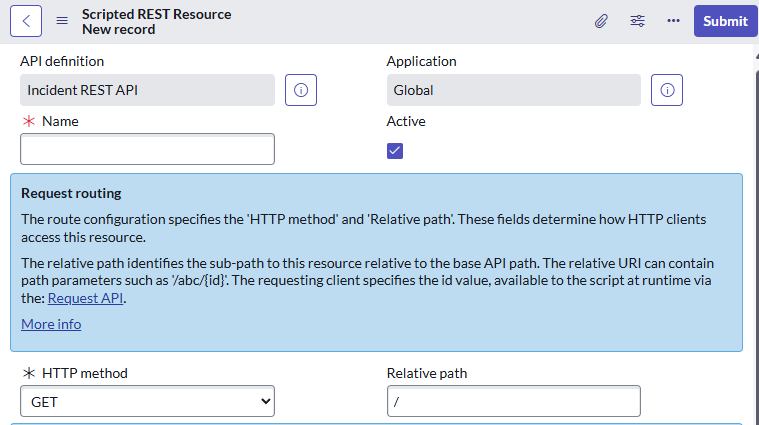
You will be directed to a form where you can define the initial details of your API. Fill in the following fields:
- Name: This is a descriptive name for your API, which will be used to identify it.
- API ID: This is a unique identifier for your API, which will be part of its URL. By default, the system auto-generates this ID based on the name you set, but you can change it if needed.
After entering the required information, click the Submit button to save your API:
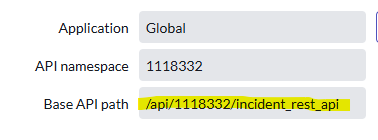
Once the API is created, it will be assigned a Base API path URL, which can be used to access it:
At this point, the API exists but doesn’t have any methods configured yet. To define the methods that will be used to interact with your API, you need to add resources.
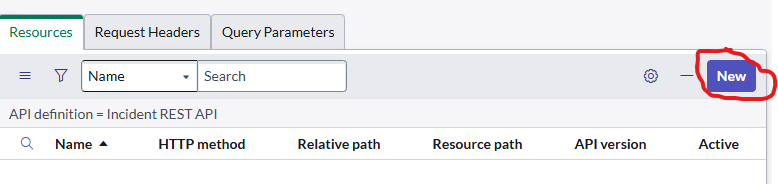
Scroll to the bottom of the form to locate the Resources related list, and then click the New button:
From the Create Resource form, you can define the different HTTP methods (such as GET, POST, PUT, DELETE) that will be available in your API. You can also configure other aspects like security settings and documentation for each resource:
In the following sections, we will dive deeper into how to create methods to perform operations for creating and reading incidents.
Creating Incidents (POST Request)
To create a new incident through your scripted REST API, you'll need to implement a method that can handle POST requests. In RESTful APIs, POST requests are used to create new entities, making it the ideal HTTP verb for this operation. Let’s start by configuring a new REST resource with the POST method. Navigate to the Resources related list of your scripted REST API and create a new resource. Set the HTTP method to POST and provide a descriptive name (we will use CreateIncident for this tutorial):

Next, we’ll implement the logic to create an incident using the API. This will be done in the Script section of the Resource configuration:

Use the following script to define the method:
(function process(/*RESTAPIRequest*/ request, /*RESTAPIResponse*/ response) {
    try {
        var requestBody = request.body.data;

        if (!requestBody.short_description) {
            response.setStatus(400);
            response.setBody({ error: "Missing required field: short_description" });
            return;
        }
        var gr = new GlideRecordSecure('incident');
        gr.initialize();

        gr.setValue('short_description', requestBody.short_description);
        gr.setValue('description', requestBody.description || '');
        gr.setValue('priority', requestBody.priority || '3');

        var incidentSysId = gr.insert();

        if (incidentSysId) {
            response.setStatus(201);
            response.setBody({
                message: "Incident created successfully",
                incident_number: gr.getValue('number'),
                sys_id: incidentSysId
            });
        } else {
            response.setStatus(500);
            response.setBody({ error: "Unable to create incident" });
        }

    } catch (error) {
        // Handle any unexpected errors
        gs.error("Error occurred in scripted REST API: " + error.details);
        response.setStatus(500);
        response.setBody({
            error: "An internal server error occurred.",
            details: error.message
        });
    }
})(request, response);
The script first checks whether the caller has provided the mandatory short_description field. This validation is crucial, as incidents cannot be created without a short description. If the field is missing, the method responds with a status code 400 (Bad Request) and an error message.
A new incident record is created using the GlideRecordSecure API, which is preferred over GlideRecord to ensure that the Access Control Lists (ACLs) are enforced. This ensures that only authorized users can create incidents and write to the relevant fields.
The script sets the short_description field to the value provided in the request body. Optional fields like description and priority are set to defaults if they are not included in the request.
The record is then inserted into the database, and the sys_id of the newly created incident is stored for reference.
The incident ID will be verified to ensure that the incident was properly created. In the case that it was created successfully, the code will set the status code of the response object to 201 (Created) to indicate that the incident was created successfully. The body of the response will then be filled out with a message to indicate the success of the operation, as well as the the sys_id of the record and the incident number. In the case that the incident was not created successfully, the status code will be set to 500 to indicate that something went wrong on the server while the request was being processed, and that the caller should try sending their request again.
If an error occurs during the processing of the request, the status code will be set to 500, and a user friendly error message will be returned to the user. A detailed message containing technical information about why the error occurred will be logged in the system log.
After inserting the script, click the Submit button in the upper-right corner to save the resource:

The Resources related list of your scripted REST API should now contain the newly created method. You have successfully configured a POST method to create incidents through your API:

In the next section, we will implement a method to retrieve incidents using a GET request, and we’ll use it to verify that our newly created incident is accessible through the API.
Reading Incidents (GET Request)
To implement a method that retrieves incidents, follow the same steps you used to create the POST method. This time, however, we’ll configure the resource to use the GET HTTP verb, which is typically used for retrieving data from the server.
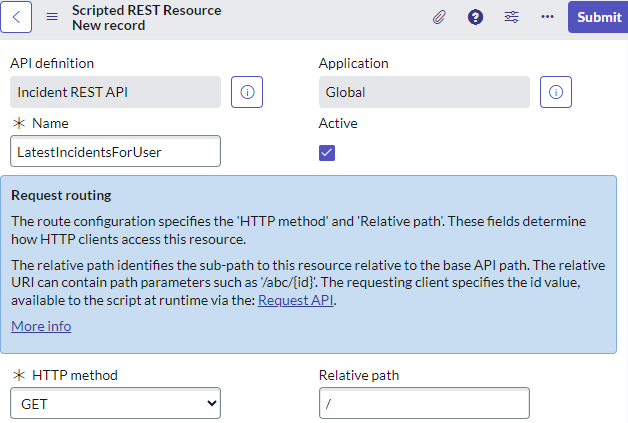
Create a new resource in the Resources related list and set the HTTP method to GET. Provide a descriptive name (we will use "LatestIncidentsForUser" in this tutorial) to indicate its functionality:
In the Script section, use the following code to define the logic of the GET method:
(function process(/*RESTAPIRequest*/ request, /*RESTAPIResponse*/ response) {
    try {
        var currentUserId = gs.getUserID();
        var incidents = [];

        var gr = new GlideRecordSecure('incident');

        gr.addQuery('assigned_to', currentUserId);
        gr.orderByDesc('sys_created_on');
        gr.setLimit(10);
        gr.query();

        while (gr.next()) {
            var incident = {
                number: gr.getValue('number'),
                short_description: gr.getValue('short_description'),
                state: gr.getValue('state'),
                priority: gr.getValue('priority'),
                assigned_to: gr.getDisplayValue('assigned_to'),
                sys_id: gr.getValue('sys_id'),
                created_on: gr.getValue('sys_created_on')
            };
            incidents.push(incident);
        }

        response.setStatus(200);
        response.setBody({
            incidents: incidents
        });

    } catch (error) {
        gs.error("Error occurred in scripted REST API process: " + error.details);

        response.setStatus(500);
        response.setBody({
            error: "An internal server error occurred.",
            details: error.message
        });
    }
})(request, response);
The script starts by getting the sys_id of the user making the request using the gs.getUserID() function. This is crucial to ensure that the script only retrieves incidents assigned to the current user.
The GlideRecordSecure API is used to query the incident table, filtering results to only include incidents where the assigned_to field matches the ID of the current user. Additionally, the query results are ordered by the sys_created_on field in descending order and limited to 10 records.
For each incident returned by the query, the script constructs an object containing details like the incident number, short_description, state, priority, assigned_to, sys_id, and created_on date. These objects are then added to an array that will be included in the response body.
If the query and processing are successful, a 200 (OK) status code is returned, along with the list of incidents in the response body.
If an error occurs during the processing of the request, a status code 500 will be returned to the user, as well as an error message for troubleshooting. A detailed message containing technical information about why the error occurred will be logged in the system log.
With both the POST and GET methods configured, we’re ready to test our API. In the next section, we’ll explore how to use the REST API Explorer in ServiceNow to create and retrieve incident records using the methods we’ve built.
Testing the API
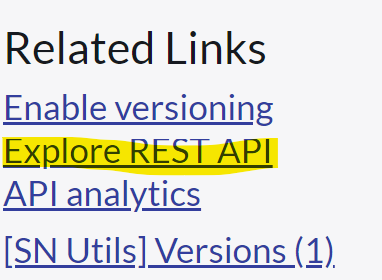
To test the REST API methods we’ve created, we’ll use the REST API Explorer. You can launch the REST API Explorer by clicking the Explore REST API link at the bottom of the Scripted REST API form under the Related Links section:
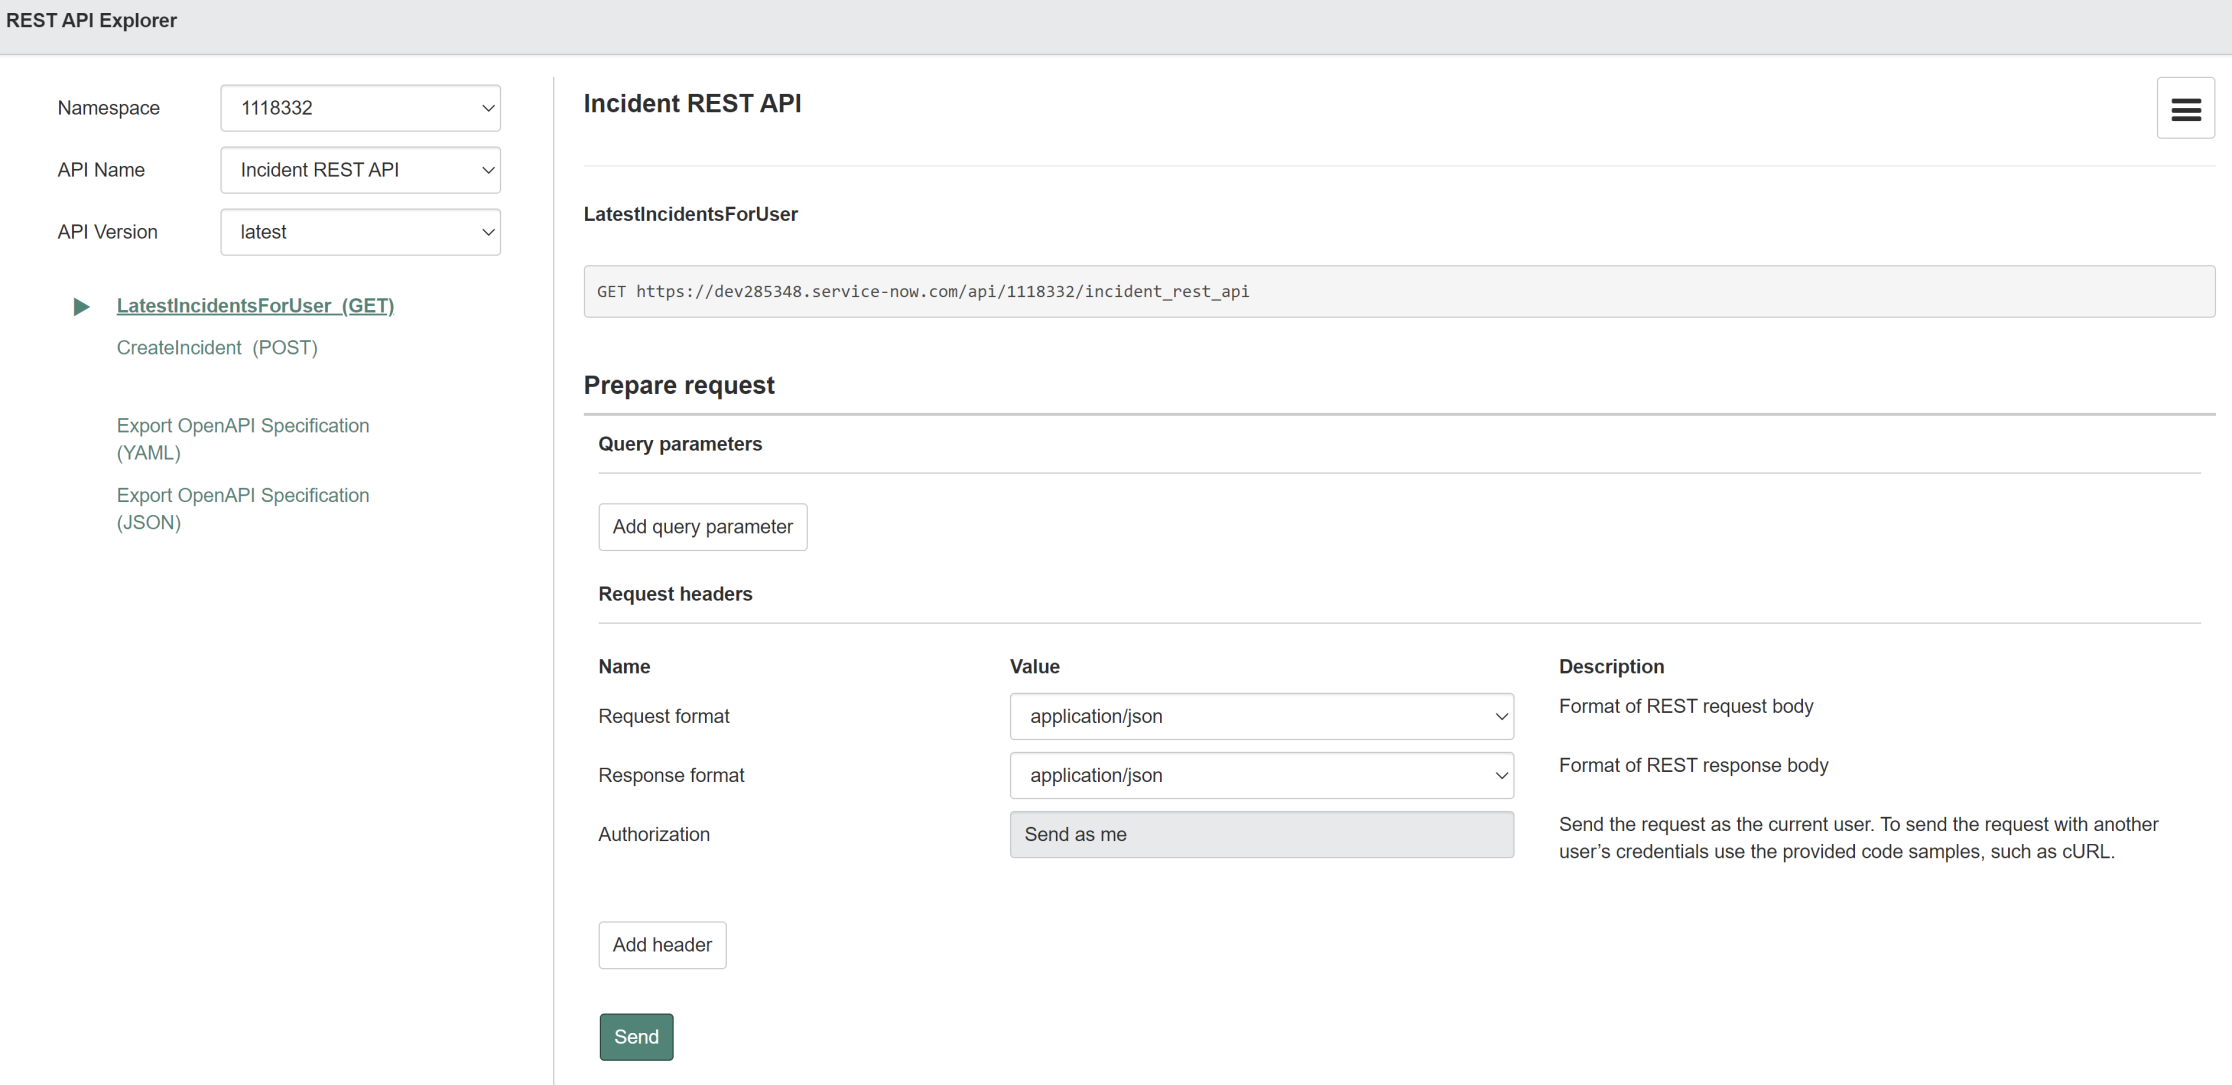
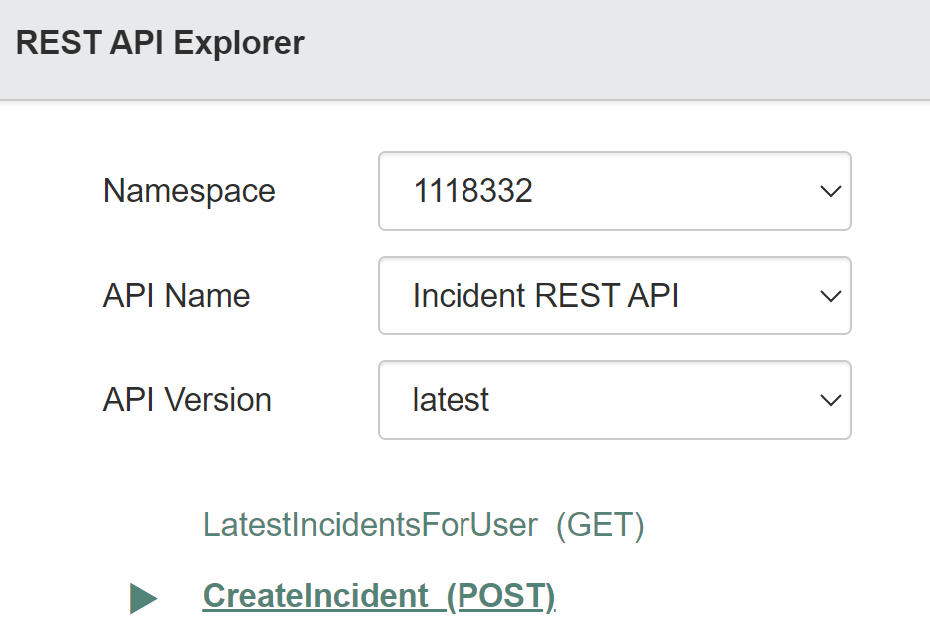
In the REST API Explorer, you’ll see the two methods we implemented (CreateIncident and LatestIncidentsForUser) listed on the left-hand side. On the right, the currently selected method is displayed, along with the list of parameters that will be sent in the request.
For this demonstration, we will keep the default JSON format (application/json) for both Request and Response formats:
Click on the CreateIncident method from the list on the left-hand side to select it. This will load the method configuration on the right-hand side:
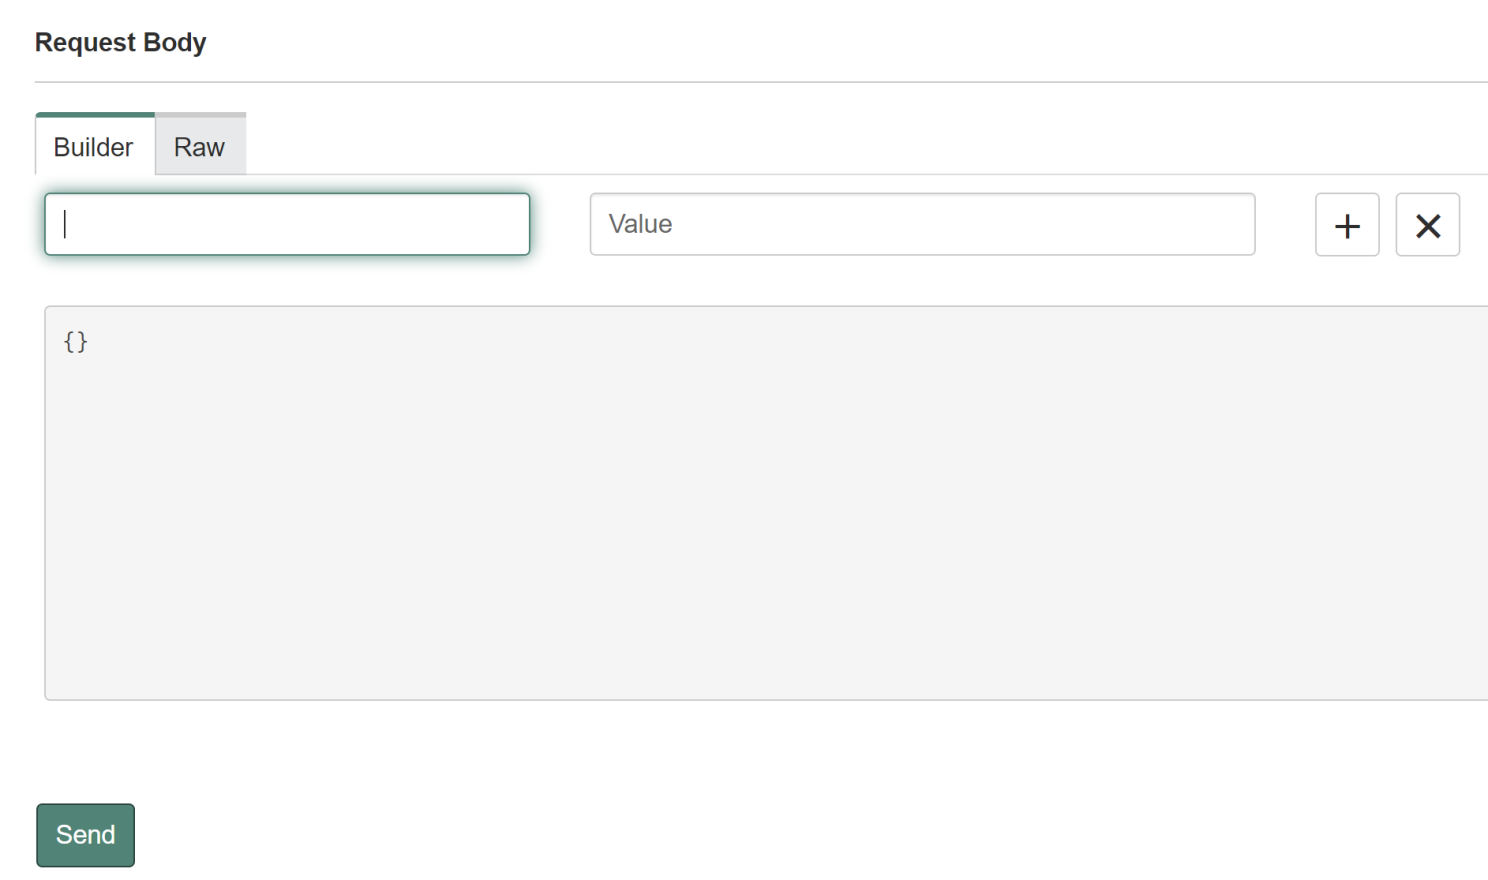
Let’s test the mandatory field validation. If we try to create an incident without providing a short_description, our expectation is that the request will fail, and an error message will be returned.
Click the Send button without filling out the short_description field and observe the response:
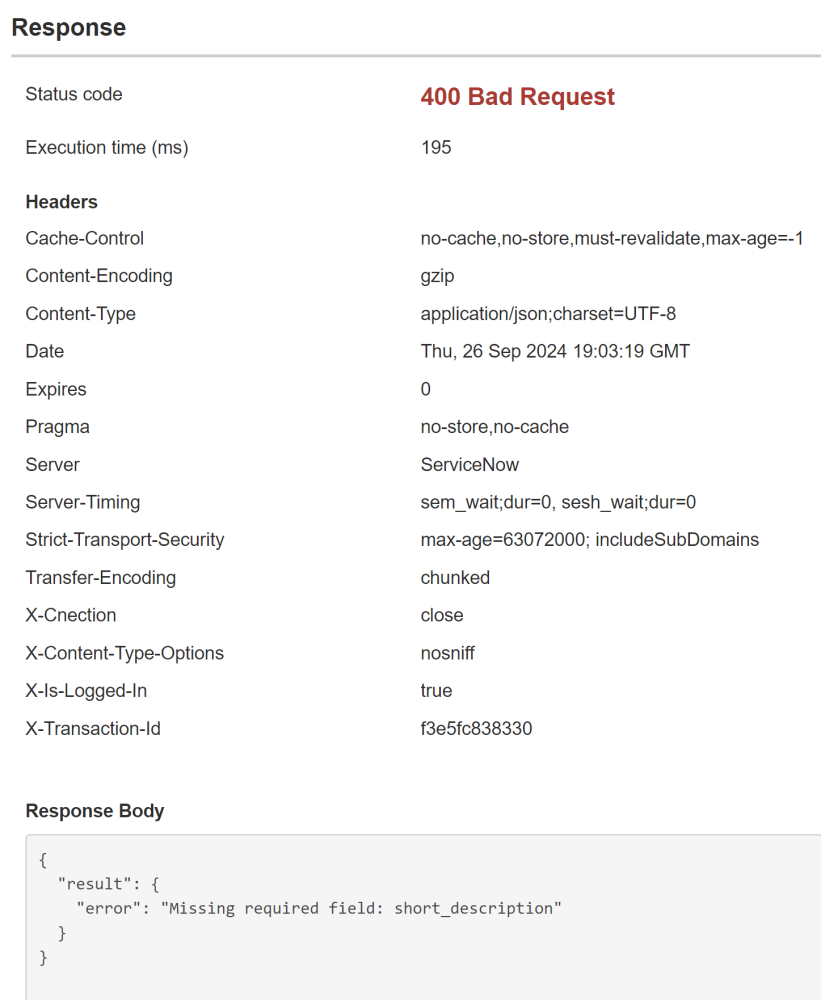
As expected, the API returns a 400 Bad Request status code along with an error message indicating that the short_description field is required:
Now, provide the mandatory short_description field along with optional fields like description and priority. After populating the fields, press Send to submit the request:
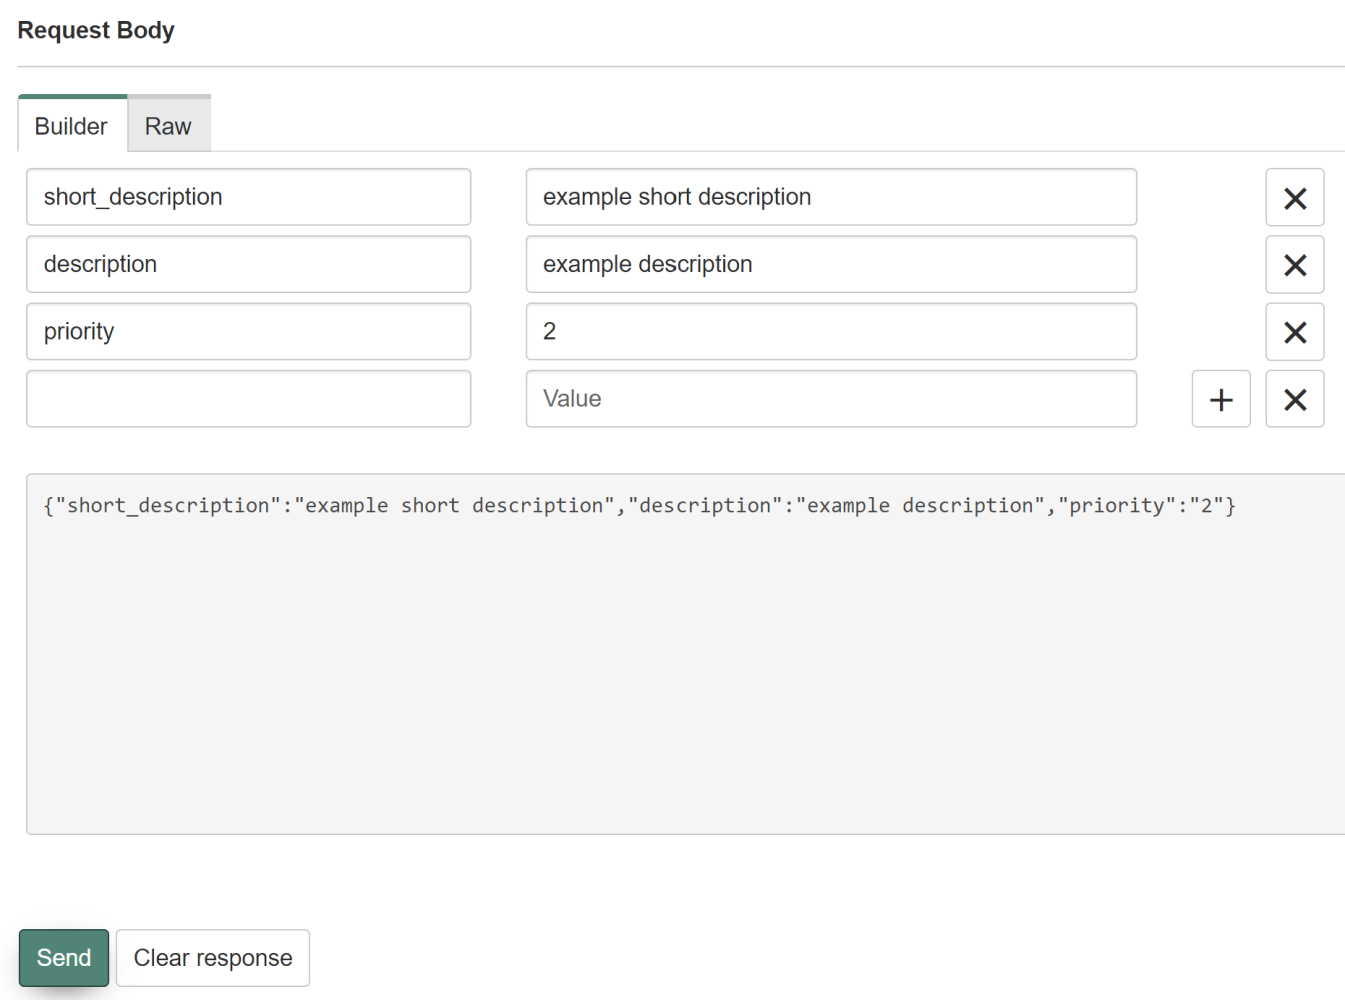
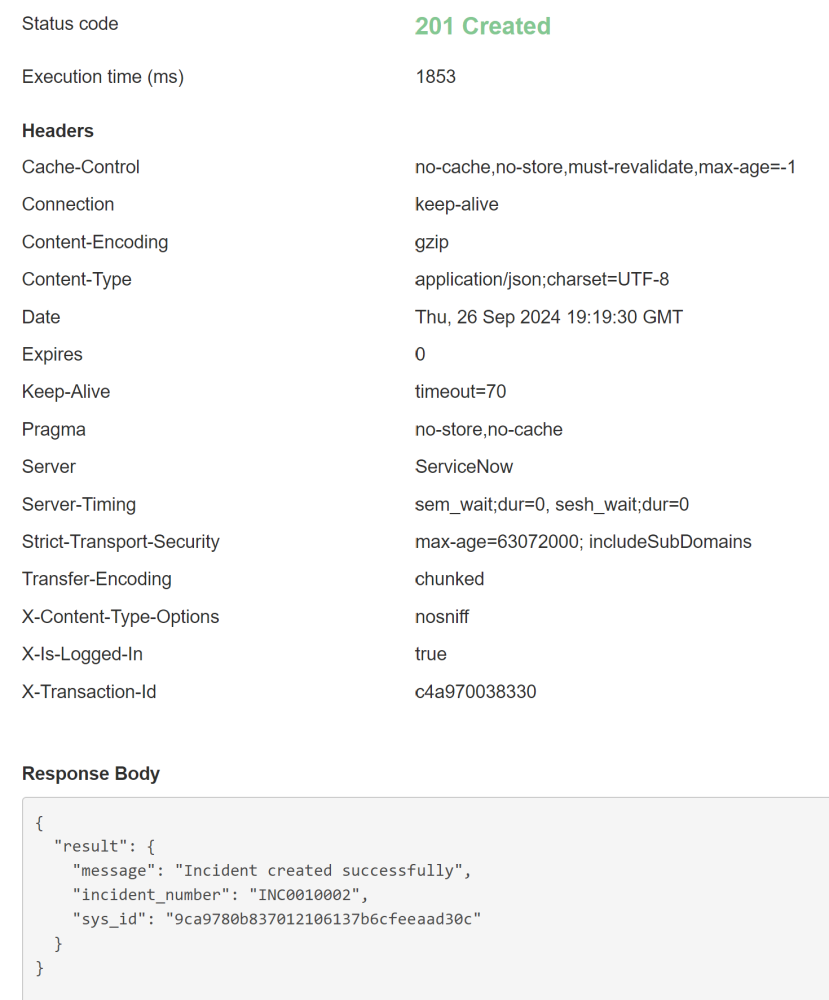
If the request is successful, the API will return a 201 Created status code along with the sys_id and incident number of the newly created incident:
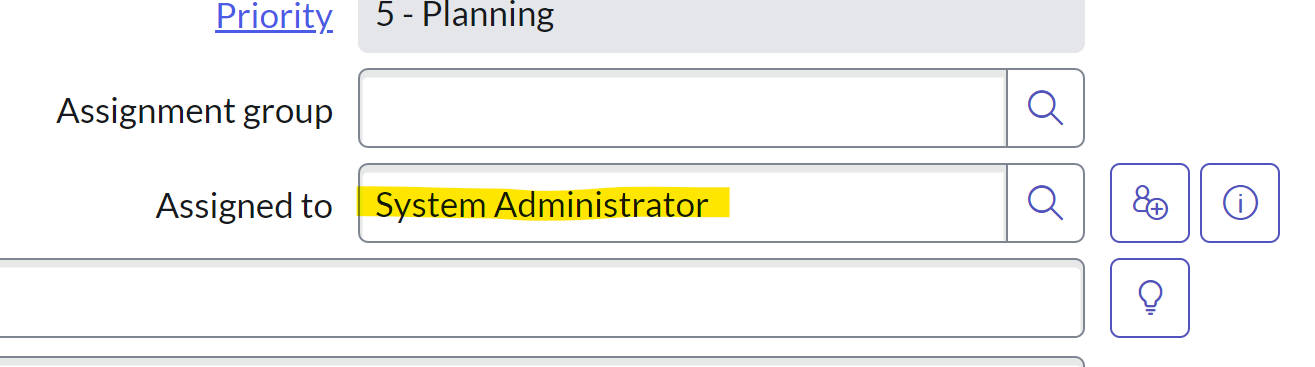
As expected, the incident was successfully created. To test the LatestIncidentsForUser method, the incident must be assigned to the user making the API request. Copy the incident number provided in the CreateIncident method’s response (INC001002). Navigate to the newly created incident in the Incident table, and assign it to the current user.
Return to the REST API Explorer, and select the GetIncidents method. Since we assigned the newly created incident to the current user, it should now appear in the list of incidents returned by this method.
Click Send to call the LatestIncidentsForUser method. The response should include the incident details:
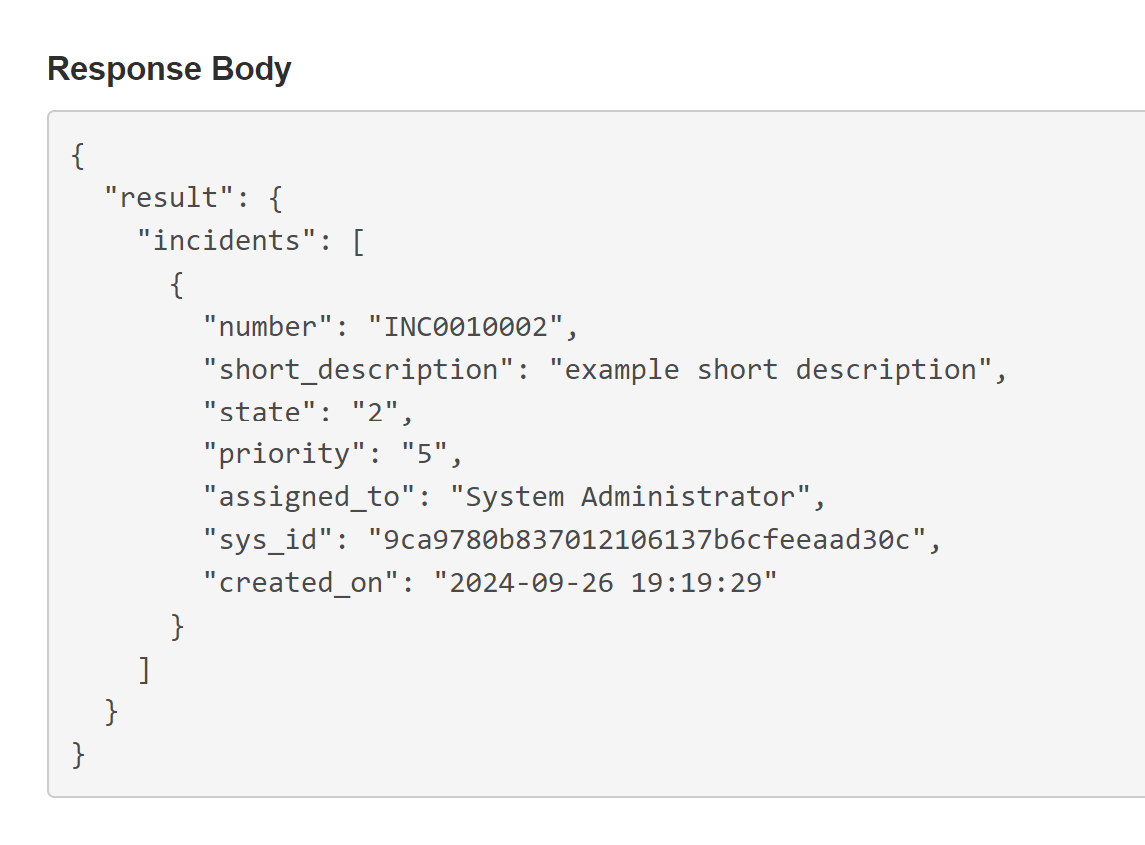
As expected, the API successfully returns the incident created using the CreateIncident method. This confirms that both the POST and GET methods are working as intended.
Conclusion
Creating scripted REST APIs in ServiceNow allows for significant flexibility in handling operations like retrieving, updating, and deleting incidents. However, it is vital to prioritize security throughout the API development lifecycle. By adhering to best practices for authentication, authorization, input validation, and logging, you can ensure that your APIs are both functional and secure.

